5 easy steps to a successful blowout
Whether it's on social media or at the office, you probably notice people with hair that is expertly styled. Oh, the style, the volume, the texture! How do they do it? Well, it all starts with the blowout! Today, we'll teach you how to get the perfect style in 5 simple and precise steps! Beware! If followed properly, this blog can lead to a ton of compliments.
Step 1
Shampoo and conditioner: Where to start?
Be sure to use cleansing products designed for your hair type. Whether you have curly hair, bleached hair, dry hair, oily hair, there is a product line for you. This basic step is the most important! Why? Healthy hair means manageable hair (I just made that saying up, but it's true anyway)!

Step 2
Styling products: Do you really need them?
Ab-so-lutely. Start with a heat-protection treatment. Any tool that emits heat can dry out your hair if you're about to use a blow dryer, rotary brush, or diffuser. Apply it to wet hair before blow drying.
Now it's time to use your favourite styling product! Will you opt for a leave-in moisturizer? It's excellent for dry hair, but you'll want to be careful not to apply it too close to the scalp to maintain volume. Maybe you'd prefer a curling cream for curly hair? If so, apply the product throughout your hair and twist strands around your fingers to sculpt your curls. This pre-drying step will give you perfect waves!

Step 3
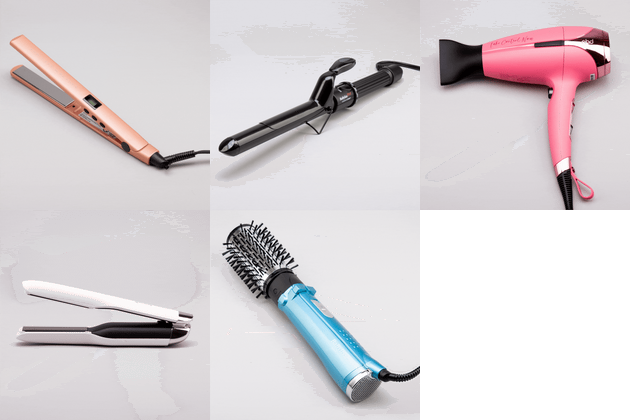
Hair dryer, brush dryer, diffuser: Choose your tools wisely!
First and foremost, use clips to section the hair horizontally properly! Whether you use a brush dryer (see this DIY here to learn all about it: https://eleganza.ca/en/pages/diy-mere-imparfaite) or a blow dryer, if your section is too wide, the hot air won't dry through all your hair. You’ll end up with lacklustre results. Rely on the size of your tool to determine how big a section of your hair should be. For example: a 1-inch round brush = 1-inch sections. If you want maximum volume, use a root lifting product and "loosen" your hair at the roots with a round brush. Blow dry with the brush facing up. Stunning results and muscular arms—guaranteed!
For curly hair, use the diffuser after applying your styling product. Avoid moving your hair around, as this will undo the beautiful curls that are created as you dry. Focus on one section of hair at a time, where you'll keep the diffuser still while your curls dry. You'll achieve a defined, shiny, frizz-free texture!
So which of these tools will you choose?

Step 4
Texture: Flat, curly, wavy?
You decide! What do you want? From mermaid waves with a 3-barrel iron to straight and smooth hair with the flat iron: your canvas is perfectly ready to be styled the way you want it! Repeat the previous step using your clips and make horizontal sections before styling—preferably from the bottom to the top!
Also, avoid going over and over the selected strand when using your heating tool. If you don't get the desired effect, it may be that your section is too wide or thick, and the heat is not penetrating evenly into each hair fibre.
Your iron may also be too hot or not hot enough. Check the instructions for use to determine the temperature required. It may not need to be at maximum temperature to get maximum results!

Step 5
The final touch: Anything but ordinary!
Now that you love your hair, all that's left is to ensure the result lasts as long as possible. After all that effort, you might as well not have to do it again in a few days! Go ahead with a finishing product of your choice: a hairspray on your entire head to maintain volume, oil on the ends for more shine or a spray gel for your curly hair...the choice is yours!
Remember that the distribution of the product affects the result. Since you probably usually style your hair in front of a mirror, you may tend to start at the front. Wrong! It would be better to distribute the product at the BACK since that's where you have the most hair. Continue to the sides and finish with the bangs! The better the product distribution, the better the results!


